| Adventures with HP HIL |
What is you could use a standard USB-keyboard with your old HP 300-series computer? Why would you want to do that? Well, the keyboard might be missing or broken, or simply have the wrong layout. In my case I happened to buy an old 9000 - 340 that had no keyboard!
HP HIL is an acronym for HP Human Interface Loop. Yet another offering from the ever-so-creative people at HP where every new computer had to have yet another, but incompatible way to connect a keyboard
HP HIL is actually quite advanced and had features like USB, but decades earlier. It allows you to connect up to 7 peripherals, designed for human input to a computer with autodetection and configuration
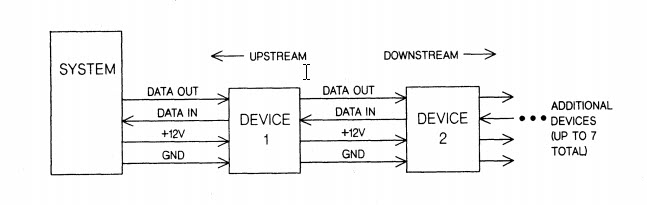
Like the name indicates, it is a loop. The computer has one input and one output in its connector and each peripheral has one input/output pair for the host or previous peripheral and one pair for the next in the chain
The host then has a high-level protocol that handles configuration, polling etc.
You will find the technical documentation here
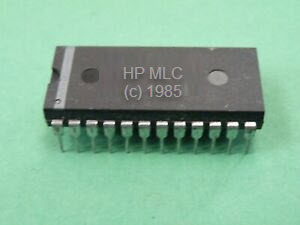
HP manufactured special chips to ease implementation. They were called the Master Link Controller and the Slave Link Controller. They were offered to vendors that had licensing agreements with HP only and can be regarded as unobtainium today. You could probably obtain original chips from used equipment on ebay, but that drives up cost and you need a microcontroller anyway for USB. For this design I opted for a software-only approach.
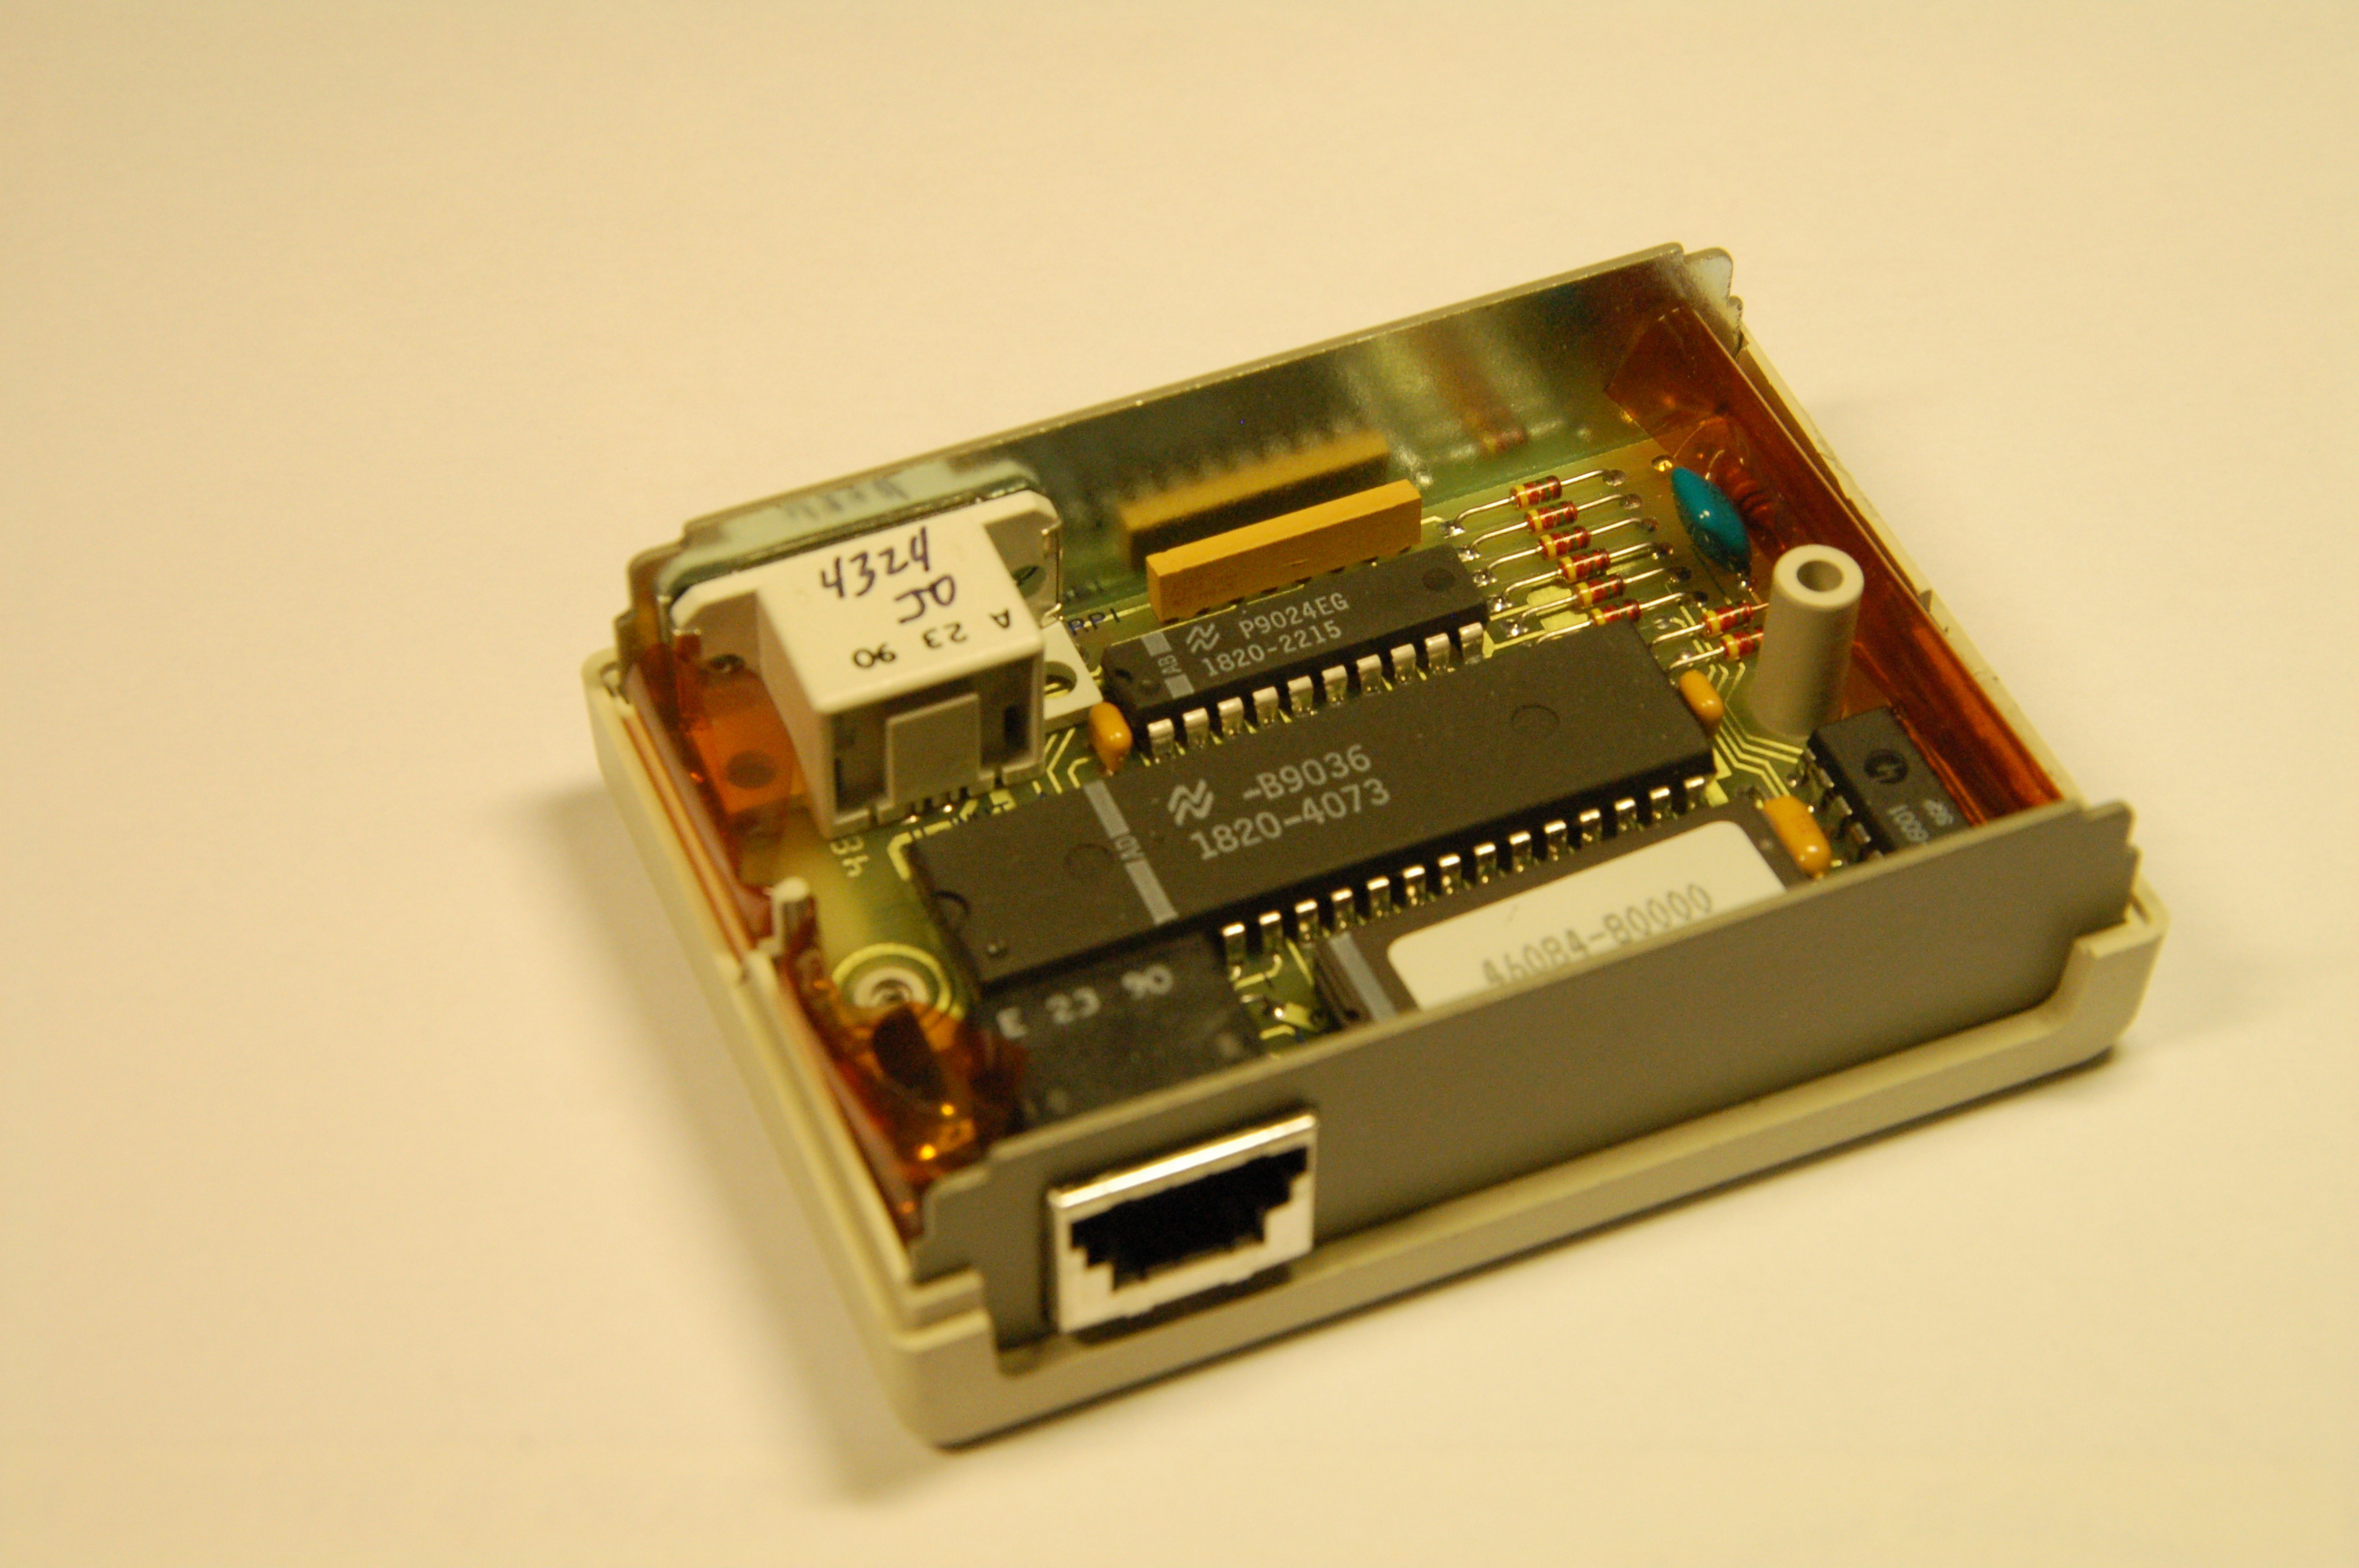
Above is an example of a HIL device. It is a HP Serial Number Dongle that was used to key expensive software to whomever had the right key. The large chip is an NS microprocessor. The HP SLC, Slave Link Controller is the small chip, bottom right. Also present is a small 3-terminal 5V regulator, a LS373 buffer chip and an EPROM. Quite a waste for just a serial number.
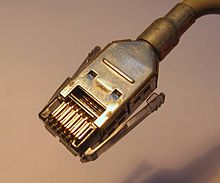
For connectors HP used SDL or Shielded Data Link connectors with four pins. The HP variety is not exactly like the standard AMP part. They are colour-coded and the docs mention other subtle differences. HP calls the connectors "Type A" indicated by one dot. This connector goes into the keyboard and "Type E" with two dots and smoke colour that goes into the computer. The corresponding AMP numbers are in the table below. Note that the ferrule is sold in quantities of 4000 from distributors.
| HP name | Explanation | AMP p/n |
|---|---|---|
| 1 Dot type A plug | Connector, male | 1-1761184-1 |
| 2 Dot type E plug | Connector, male | 15-1761184-1 |
| Top shield | 520460-1 | |
| Bottom shield | 520461-1 | |
| Ferrule | 520432-1 | |
| 1 Dot type A Keyboard Socket | Connector, female1-1761185-1 |
AMP has a ridicously expensive crimp tool, but people tell me that you can crimp the individual connectors by pressing down with a screwdriver
HP HIL is based on frames. A frame is 15 bits long, including start, stop and parity and the bit-time is 10us which gives 100kb/s. The number of bits mean that we cannot use regular UARTs for communication. I will use a software UART timed by the PIC output compare interrupts.
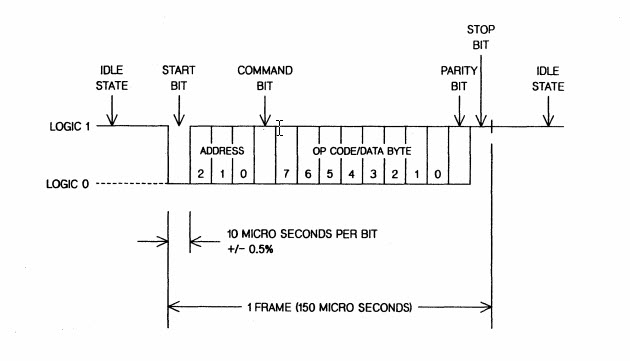
As you can see, the frame contains addressing info and a payload byte
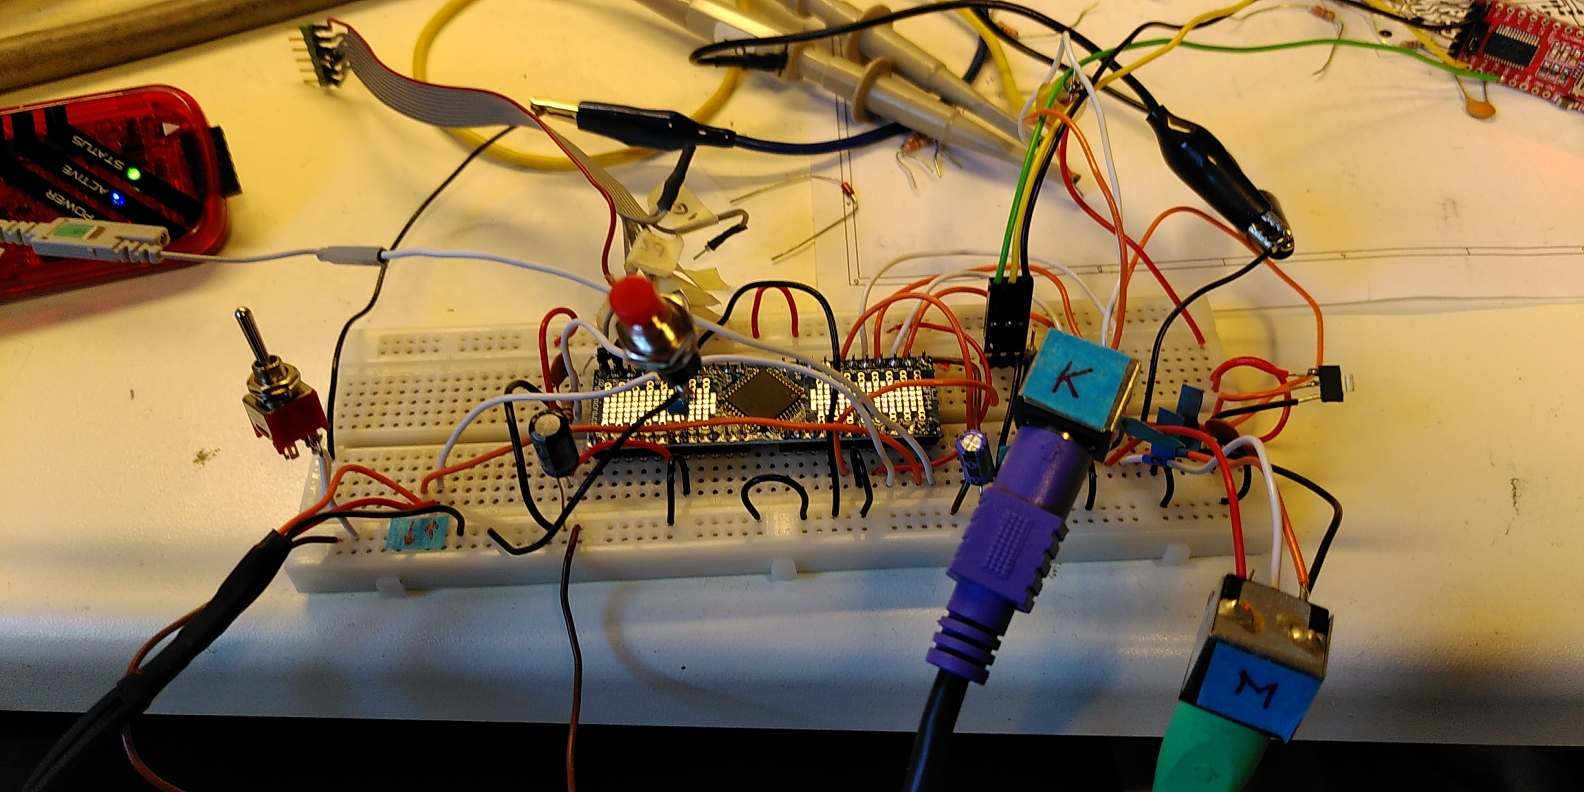
I decided to use the same circuit as my HP 200 series adapter for this, but to test, I needed to create the HP HIL Frames in a controlled fashion so I came up with this. It is basically two shift registers clocked from a 100kHz signal generator. A counter lets you send a continous string of frames or you can use a pushbutton to send a payload with a value set by the DIP switch.
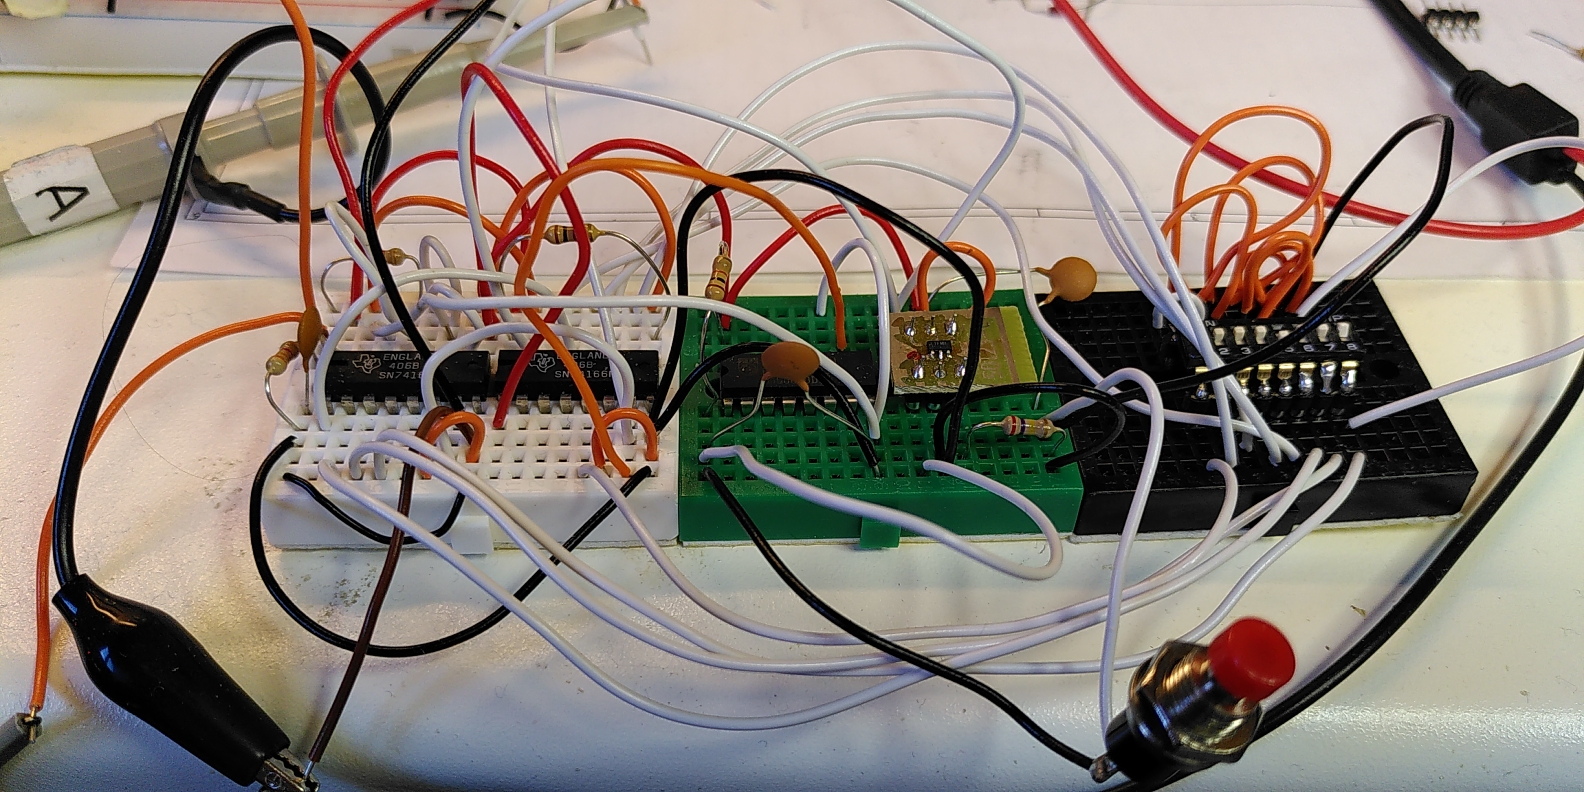
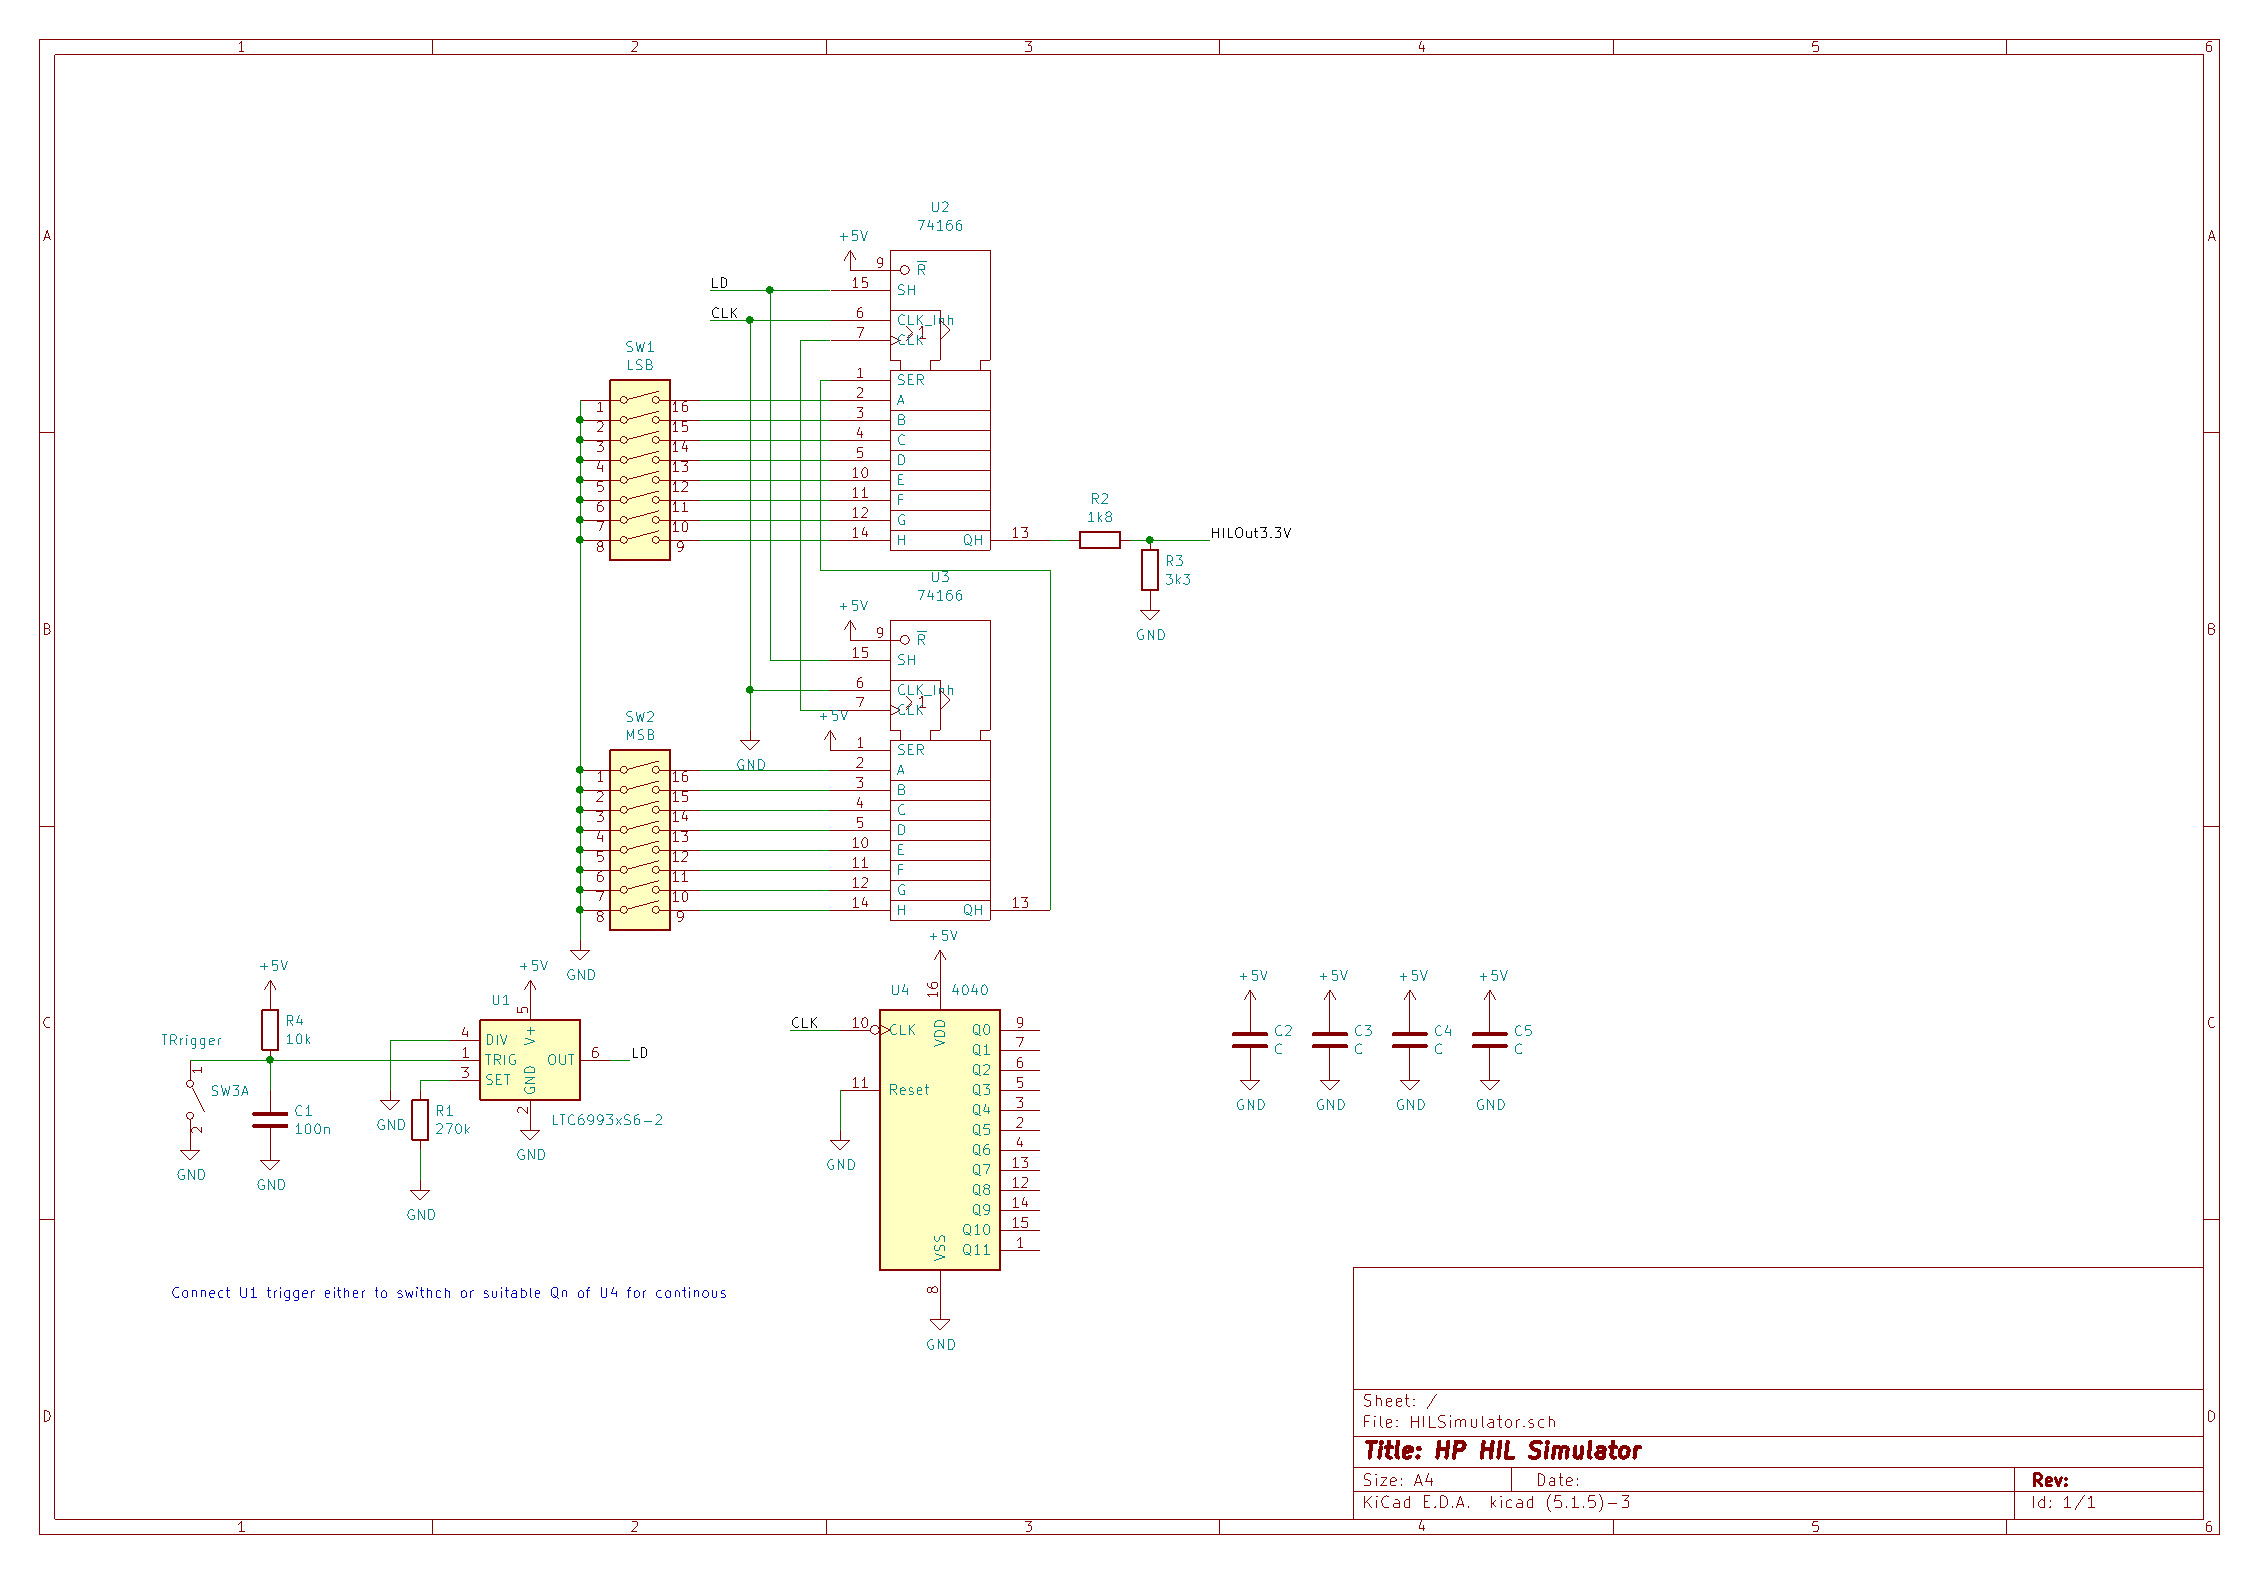
Click on the schematic for a larger PDF
Testing with real hardware commenced when the HP 9000-340 arrived. The code worked almost right away. Only real issue was an addressing problem where I had forgotten to reverse the address in one place. The bits in the frame are ordered the other way to what you would expect in a normal RS232 frame. The first prototype supports PS/2 keyboard only, but mouse will be added when I upgrade to a 44-pin part to get more 5V tolerant pins. USB comes later
The prototype works with the HP9000-340 just fine. I need to do some work on the key mapping though. Has anyone noticed how prototypes tend to gravitate towards the edge of the desk from the pull of cables, and finally fall off?
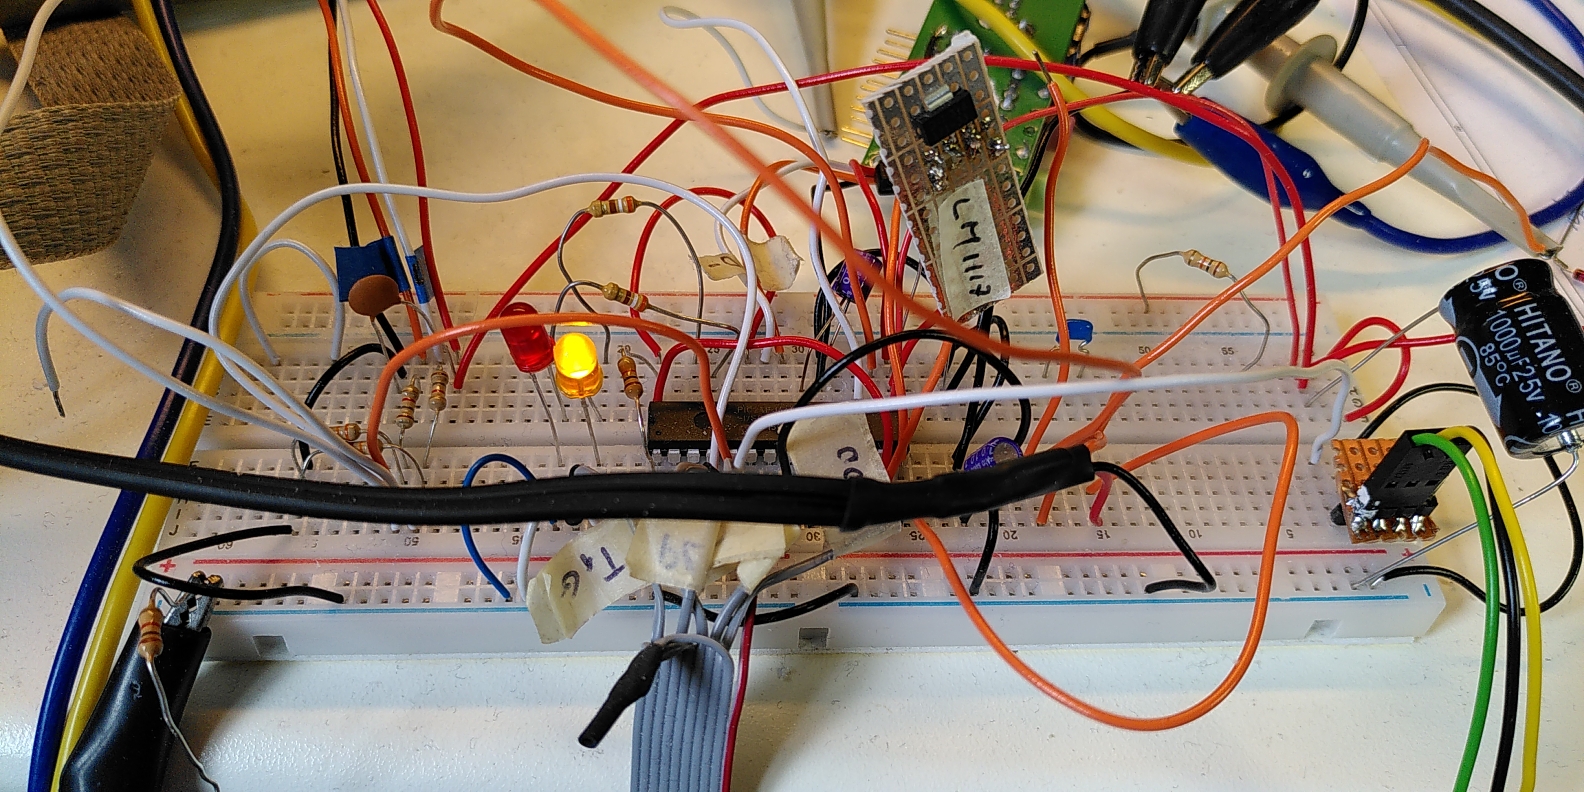
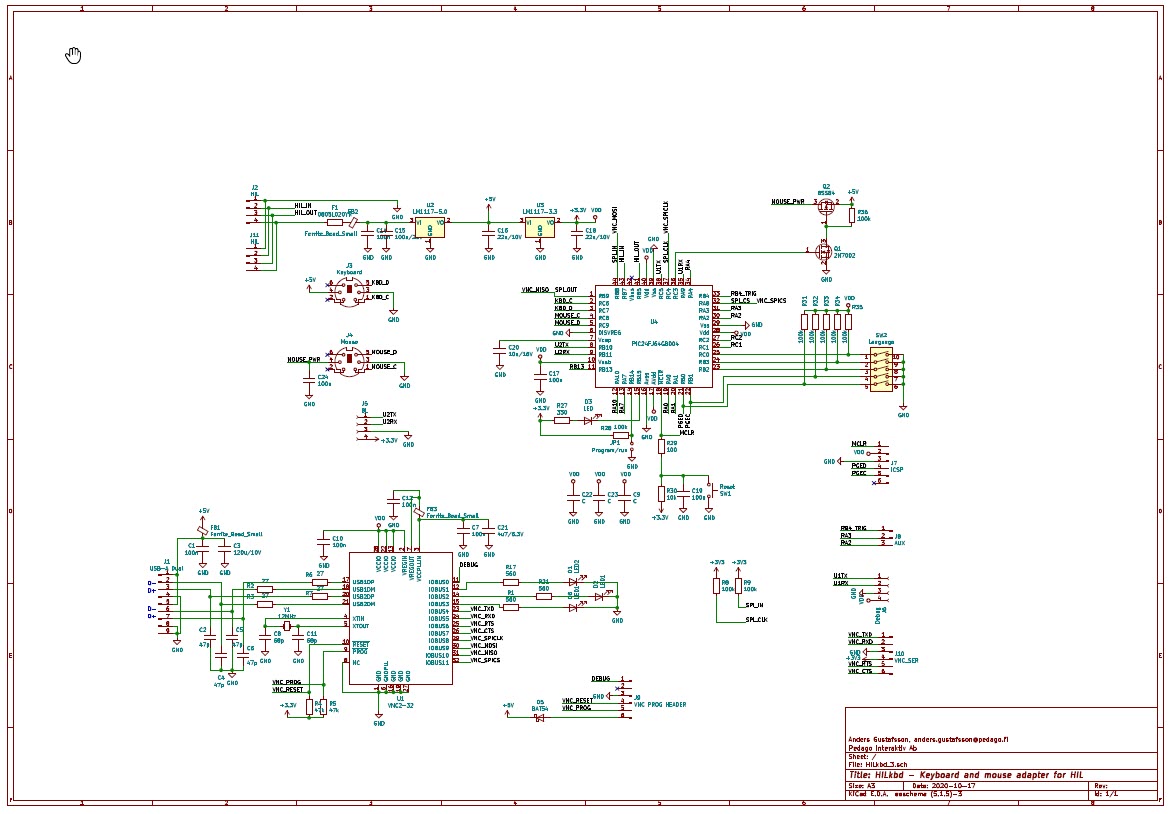
This one is based on a 44-pin part, the PIC24FJ64GB004. Reason is to get more 5V tolerant input pins. Here both keyboard and mouse are connected as you can see.
Code is slowly getting there and I can now move the cursor and register keypresses as can be seen in this film. So that is PS/2, but USB is next. I have shelved the idea of suing the built-in USB hardware and Microchip USB stack as it does not support multiple units. I will most likely use a Vinculum USB chip instead.
I will probably add circuitry to control the power to the PS/2 ports from the PIC so that I can reset keyboard and mouse reliably if I need to.
After some testing with the FTDI VNC1 I finally settled on the VNC2 for USB. I can now offload the complete USB handling to it at the cost oof a few extra components. The downsize was that I had to develop firmware for the VNC2. The VNC2 firmware I developed is loosely based on one of their samples and makes the VNC2 act as an USB to SPI Master so all the PIC has to do is to act on SPI input. That is: If there is no USB then there is zero overhead.
The design of the PCB is such that you can either use USB, PS/2 or both. If you just want PS/2, then omit the VNC2 and associated components and add two resistors to pull the SPI input and clock high. If USB is your thing, then omit the PS/2 connectors and mouse reset fets.
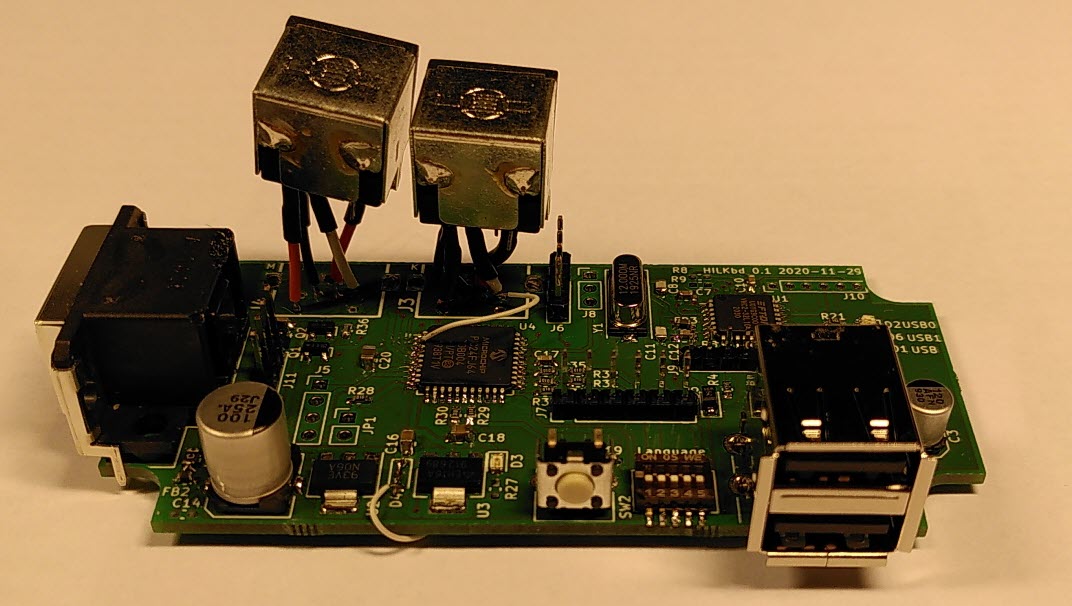
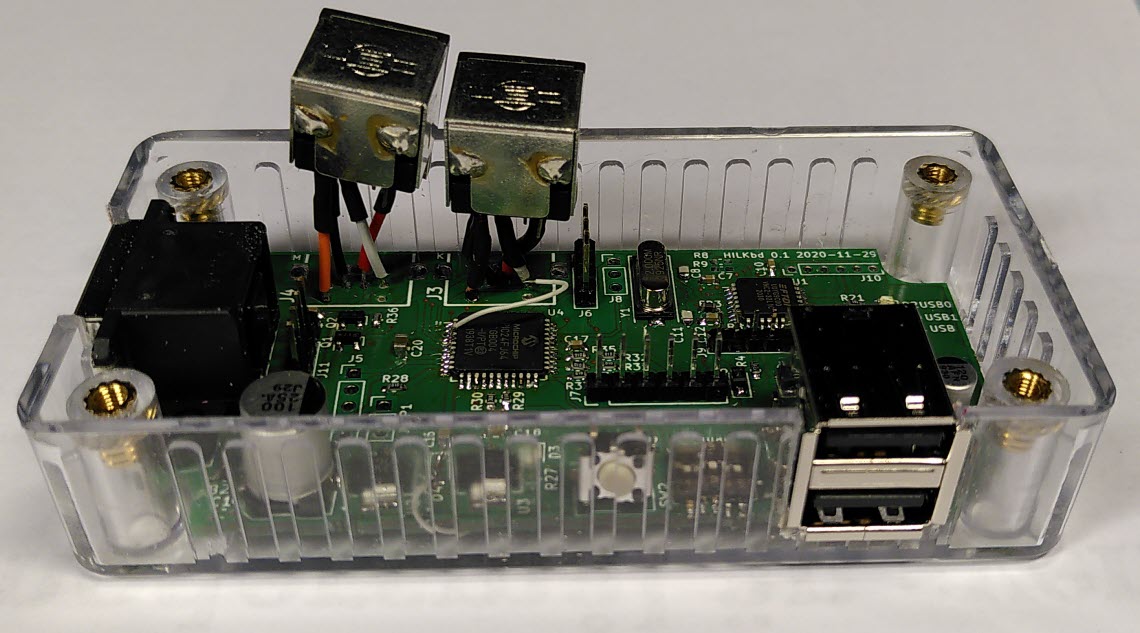
Yes, naturally did I forget to check the readymade Mini-DIN footprints so they were incorrect. I have ordered new PCBs, but will continue to tweak the FW with this one. The PCB is designed to fit into a plastic Hammond box (1591ATCL). The same one I used for my 98x6 to USB adapter
There is no one-to-one correspondence between modern PC keyboards and the HP HIL keyboards so you need to map some keys.
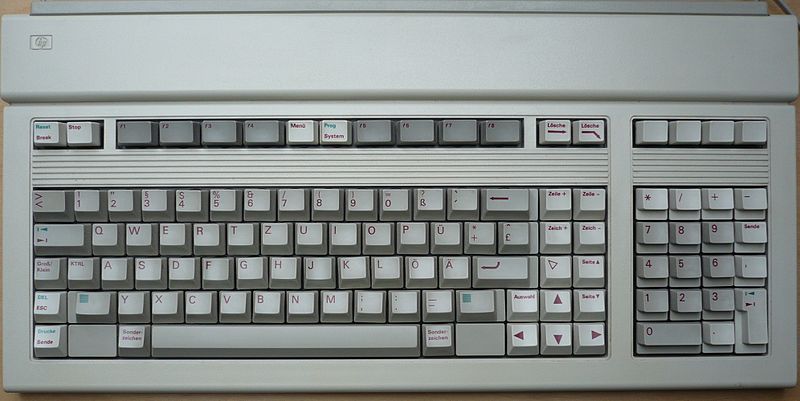
The challenge is that there is no 1:1 correspondence so you have to try to map intelligently. Modern USb keyboards are simpler as they have extra keys and multimedia keyboards wven more so, but mapping an ols PS/2 keyboard is a challenge. Standard ITF-Keyboard below.

Thanks to Kuba Ober for the HP Keyboard graphics

Standard PS/2 keyboard layout

Mapping layout v 0.1. The right Ctrl-key on the PS/2 or USB keyboard is now an extra shift key. When shifted some keys have different functions. Here shown in red.
The schematic is here
You will find a zipfile of the PIC code here. And the VNC2 code here. All I ask is that you send me any improvements you make and credit me as the original author. Note that the VNC toolset is freely downloadable as is the MPLABx IDE and compiler.
You will find the PIC HEX file here.
Boards can be ordered from Aisler.
This information and the circuits are provided as is without any express or implied warranties. While every effort has been taken to ensure the accuracy of the information contained in this text, the authors/maintainers/contributors assume no responsibility for errors or omissions, or for damages resulting from the use of the information contained herein. I disclaim everything. The contents of the articles below might be totally inaccurate, inappropriate, or misguided. There is no guarantee as to the suitability of said circuits and information for any purpose whatsoever other than as a self-training aid. I.E. If it blows your equipments, trashes your hard disc, wipes your backup, burns your building down or just plain don't work, IT ISN'T MY FAULT. In the event of judicial ruling to the contrary, any liability shall be limited to the sum charged on you by us for the aforementioned document or nothing, whichever is the lower. I will not be held responsible for any damages or costs which might occur as a result of my advice or designs. Nor are you allowed to use any of my designs for commercial purposes without my written authorisation.
